Thursday, October 31, 2013

Bowling Alley Counter Tops Part 4

I know my post about my projects can really drag out, but if I waited until the project was done to post something then there would months between post and that happens often enough. So thanks for putting up with small updates and multiple part post.

This week during my late night shop time I've been working to patch the holes in the maple edge on the large counter top. There were two larger holes where the lane was bolted down, I am patching those areas. I made a template and then used my router with a guide collar to route out the waste.

1/4" spiral bit with a 3/8" guide bushing does a good job clearing the waste
 After routing I clean up the corners with a chisel and then size the patch to fit, using combination of sanding and planing to make the patch fit.

There were a lot of holes in the edging from the nails. I plugged the bigger holes with maple plugs. There was one spot where the damage was bigger than a 3/8" plug would cover so I chopped out the area and made a small patch.

Next step is to flush trim all the plugs and patches and then clean up the face of the maple edge and glue the top back together. I hope to accomplish that this weekend and get the first coat of finish on.

Tuesday, October 29, 2013

Bowling Alley Counter Tops Part 3

Since the last post I haven't had a chance to do much other than I got the rest of the large section taken apart. I plan to repair the two big holes in the maple edging and plug some of the nail holes tonight and start gluing it all back together tonight and tomorrow night. I have the smaller counter inside the house letting the poly cure more before I try and fix the couple of blemishes in the finish.

The projects are lining up for after the counter tops are done. The big entertainment center is going to be pushed back again. Both the kids are needing some bookcase for their rooms. The materials I had bought for the entertainment center will be re-purposed to build the book cases.  I also want to get my lathe setup to make some gifts for Christmas.


Thursday, October 24, 2013

Bowling Alley Counter Tops Part 2

I've been working on finishing the smaller piece of counter top for the last week. The weather has cooled off so for finishing I have to get the shop warmed up and keep it warm while the finish cures.

I am using Minwax Spar Urethane in satin on the counter tops. The spar urethane really adds a richness and warmth I am happy with how it is looking.
I started by applying a coat to the bottom side

I marked the counter top with my brand in a location that will be visible from inside the cabinet.

After the first coat


After the first coat has dried.

After the first coat has dried.
 I've put 4 coats on the counter top and still have some work to do on it to take care of some flaws in the finish.

While the smaller piece cures I started working on the large section. I will taking this one all the way apart and re-assembling with glue. First step was to remove the old finish, I again used my hand plane to remove the finish.

 Next step was to flip the counter top and then start pulling it apart. There are a lot of nails in there. This is where I had to stop for the night last night.
7 rows out of 24 removed and de-nailed

Wednesday, October 16, 2013

Bowling Alley Counter Tops

My in laws have been remodeling their kitchen and ask me to help by taking care of the counter tops. They found a section of bowling alley for sale and we decided that would make a neat counter top. My father in law cut the pieces to the size needed so my job was to prep and refinish them.

each section was originally 42" wide and 2.5" thick and VERY heavy

It turns out the pieces aren't glued together but held together with a lot of nails. Figuring out how would be best to keep it together added a lot of time to this project. I ended up using some 10" screws offset and counter sunk to try and hold it all together.

The first step was to get as much of the old finish off as possible. I thought using a card scraper would be a good choice for this and it did work good, but when I started sanding it still acted like there was finish there.

 Since that didn't work as good as I had hoped I tried hand planing the top. The pine planed very nicely and this quickly got to unfinished wood.
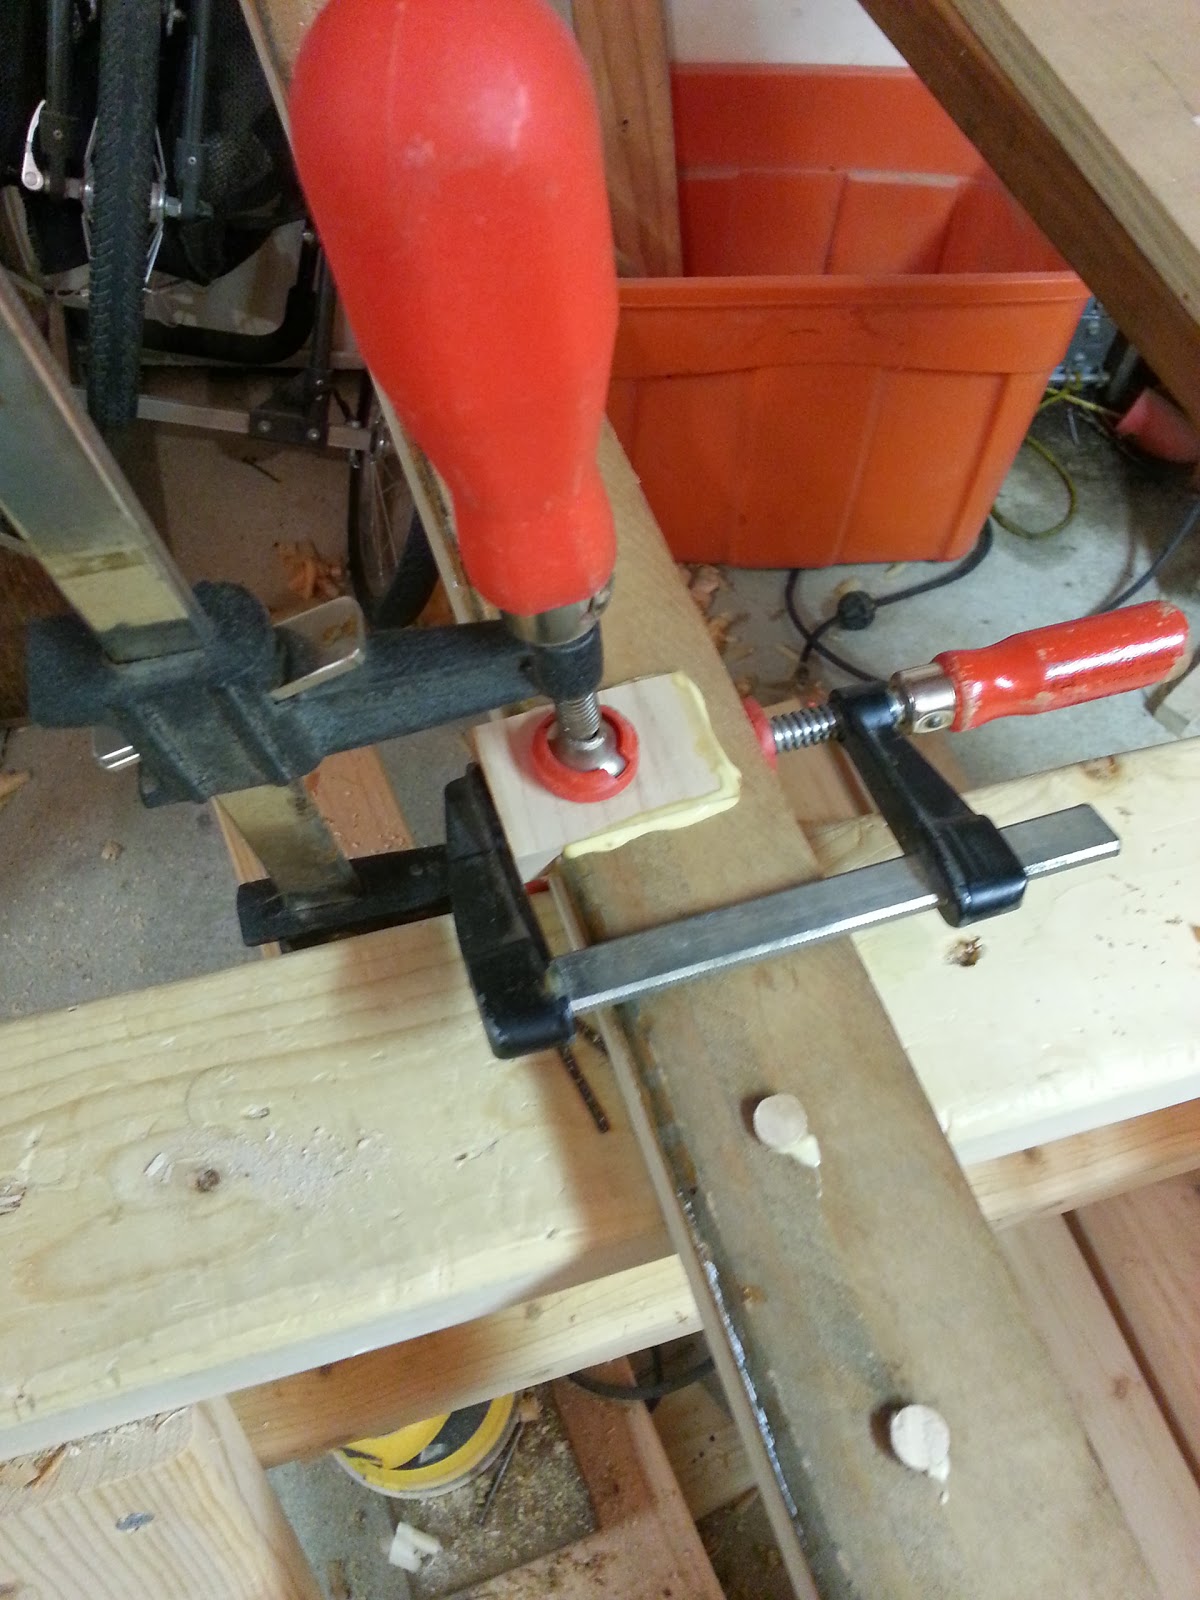
 The maple edge board had some damage/holes where it had been bolted down, so I patched those spots.

 Ready for finish.

 I've never had a good experience staining pine, even using pre-stain products, so I tired some Medium walnut Danish Oil on a scrap and was pleased with the color. I put two coats on the Danish Oil as per the directions on the can. The color wasn't as dark as the sample so I had my in-laws come out to see it in person before I went any further. They were happy with the color so I will be top coating this piece of counter top in the next few day.

This is the smaller counter top and there is another one I still have to start on. I am going to be disassembling it and putting it all back together with glue. The sink will be in the next section and it will be the main food prep area also. I am more worried about cracks opening on that section. Hopefully in the next post about the counter tops the smaller one will be finished and installed and the larger one will be well on its way to being done.

Tuesday, October 15, 2013

Rocket man


Fall is here which should mean more shop time is coming. I've been trying to squeeze shop time during the week. I will post soon about a bigger project I am working on but wanted to post about some of the smaller things I've been working on.

Half Steps
There are two tall steps at my parents house so to make it easier on mom to be able and get up and down them I built two half steps which cut the height in half.  I built them with a 2x6 frame (riped to the height of the step) and then wrapped the frame with oak plywood. The stair tread is made from oak plywood and edged with solid oak. I then stained the oak to match the kitchen cabinets as close as I could using off the shelf stain colors. Seeing how much easier it is for mom to get around now makes me very happy about this project.


step frame work


Ready to install

Step into the bathroom

  • Step into living room
Toy Rocket
I wanted to build a simple toy for my son, I came up with the idea of a simple toy rocket. It's built from scrap 2x4's and some cherry I had in the scrap pile. He was so happy with it, I want to build him more toys.


Wooden Spoons
I follow Paul Sellers on his blog and YouTube and he recently had a series on making wooden spoons. One of the post and videos was on carving them from firewood with a hatchet. This really interested me and I had to give it try.  I was amazed how fast I could rough out a spoon blank with just a hatchet.  I have finished carving one spoon and have several other in different stages.


That is a update on some of the smaller things I've been working on lately. I hope to get my lathe set up soon and start turning some pens and gifts when I have limited shop time.